2026 Top LED Maintenance Tips for Optimal Performance?

Time:2026-09-17 Author:Sophia
0%

LED lighting is efficient, durable, and surprisingly easy to neglect. Dust gathers on lenses, heat settles inside fixtures, and loose connections quietly reduce performance. That is why “How to maintain your LED lights for optimal performance?” deserves a practical answer, not a generic cleaning checklist. Proper maintenance protects brightness, color consistency, energy savings, and service life.

Lighting engineer James R. Benya captures the central lesson: “LEDs are not maintenance-free; they are maintenance-light.” The distinction matters. LED fixtures need less frequent attention, but they still require inspection. A shop owner may notice darkened lenses near a loading door. A facility manager may find blocked ventilation above a high-bay fixture. Small details can create larger failures.

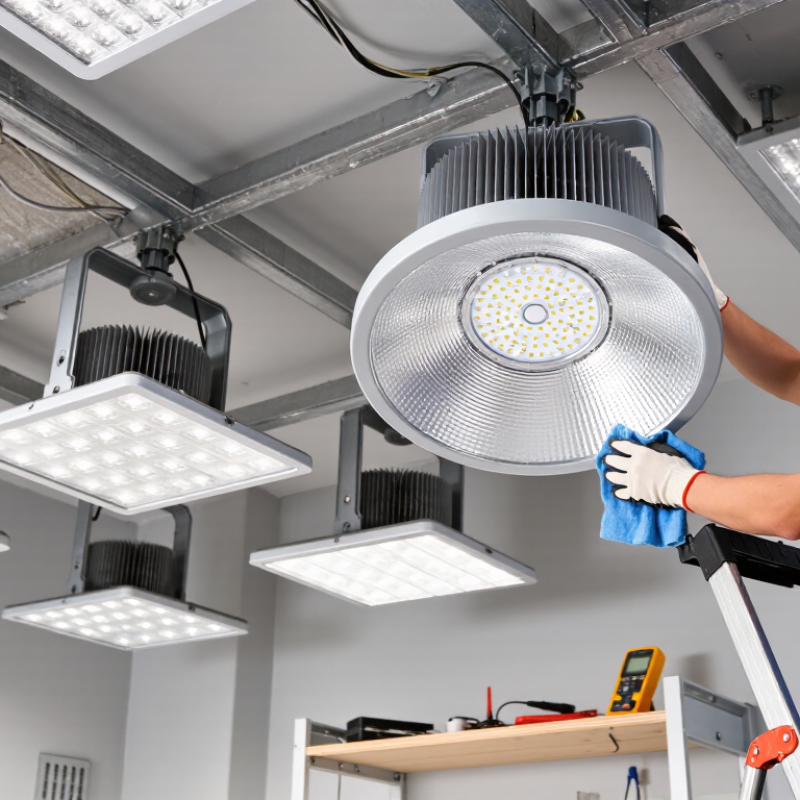
This guide focuses on realistic maintenance habits. You will learn how to inspect lenses, clean fixtures safely, check heat buildup, review flicker, and identify early driver problems. Use a soft, dry cloth before reaching for stronger cleaners. Check mounting points after vibration or seasonal temperature changes. Record unusual dimming, buzzing, or color shifts.

No schedule fits every building. Outdoor signs, warehouses, kitchens, and offices face different conditions. That part is often underestimated. Even careful teams miss hidden dust above ceiling panels. A simple maintenance log can expose patterns before replacement becomes expensive. Always follow the manufacturer’s instructions and isolate power before servicing. LED technology is reliable, but reliability still depends on attention, sound judgment, and consistent checks.
2026 Top LED Maintenance Tips for Optimal Performance?

LED System Basics and Performance Factors

2026 Top LED Maintenance Tips for Optimal Performance?

LED System Basics and Performance Factors

LED systems depend on three core elements: light-emitting diodes, drivers, and thermal control. The driver regulates electrical current, while the housing removes heat from sensitive components. Excess heat can reduce brightness, shorten service life, and create unstable output.

In practical inspections, I check airflow around fixtures before touching the lenses. Blocked vents often explain dimming problems.

Clean optical surfaces with a soft, dry cloth and suitable cleaning methods. Dust scatters light and may create uneven illumination on floors or work surfaces. Inspect cables, connectors, and mounting points for corrosion, looseness, or heat discoloration. Small faults matter. Confirm that voltage and current match the system specifications. Incorrect electrical conditions may cause flicker, premature failure, or driver damage.

Performance also depends on the environment. High humidity, vibration, and frequent switching can stress different components. Record operating temperatures, unusual noise, flicker, and changes in color appearance during each inspection. A simple maintenance log improves reliability and supports informed repairs.

I once focused too heavily on visible dirt and missed a failing connector, which delayed the real fix. That experience changed my inspection routine. Clean lighting is not always healthy lighting.

Use calibrated light measurements when consistent output is critical, and review results against the original installation data. Sensor-based monitoring can help, but it still needs human judgment.

Routine Inspection and Safe Maintenance Procedures

Routine inspection is the foundation of reliable LED performance. Check fixtures monthly in dusty, humid, or vibrating areas. Look for flickering, dark segments, cracked lenses, loose fasteners, and discoloration near heat sinks. A warm housing is normal, but unusual heat deserves attention. Use a non-contact thermometer when possible, and record temperature readings over time.

Maintenance tips: Clean lenses with a soft, dry cloth first. If needed, use a lightly dampened cloth and approved neutral cleaner. Never spray liquid directly onto the fixture. Inspect cables for cuts, crushed insulation, or loose connections. Confirm that ventilation openings remain clear. Small details matter.

Safe maintenance begins with switching off power at the correct isolation point. Verify that the circuit is de-energized before opening any enclosure. Wear suitable eye protection and insulated gloves when conditions require them. Let hot components cool before handling them. Static electricity can damage sensitive LED drivers, so use proper grounding procedures. Replace damaged seals, connectors, or mounting hardware promptly. Follow the equipment’s service instructions and local electrical requirements. Do not bypass protective covers or safety devices. I have seen minor moisture marks become major failures after repeated neglect. That lesson is easy to remember, but inspections are still sometimes rushed. Document every repair, measurement, and unusual symptom for the next technician.

2026 Top LED Maintenance Tips for Optimal Performance? - Routine Inspection and Safe Maintenance Procedures

Routine inspection and safe maintenance procedures for LED lighting systems
Maintenance Area Recommended Frequency Inspection or Maintenance Action Practical Acceptance Criteria Safe Procedure Record to Keep
Visual Condition Monthly Check the LED housing, lens, diffuser, mounting hardware, seals, and cable entries for cracks, discoloration, moisture, corrosion, or loose parts. No exposed conductors, broken lenses, loose fittings, water ingress, or visible overheating marks. Do not touch damaged equipment. Isolate the circuit and arrange qualified electrical repair when damage is found. Inspection date, fixture location, defect description, photographs, and corrective-action status.
Light Output Quarterly Compare illumination with the original commissioning results or a defined baseline. Check for flicker, dark spots, uneven lighting, and abnormal color changes. Lighting remains suitable for the task and does not show a significant unexplained reduction from the established baseline. Use a calibrated light meter where measurements are required. Avoid looking directly into high-intensity LED sources. Measurement location, lux reading, meter identification, operating conditions, and comparison with baseline data.
Lens and Diffuser Cleaning Every 3–6 months Remove dust, oil, insects, and other deposits from lenses, reflectors, and diffusers using a soft lint-free cloth and a compatible mild cleaning solution. Optical surfaces are clean, clear, dry, and free from scratches or residue that could reduce light transmission. Switch off power before cleaning. Do not use abrasive pads, aggressive solvents, pressurized water, or excessive liquid near electrical parts. Cleaning date, cleaning method, areas serviced, and any damaged optical components.
Thermal Management Quarterly; more often in dusty areas Inspect heat sinks and ventilation paths for dust accumulation or obstructions. Confirm that surrounding equipment or insulation is not blocking heat dissipation. Heat-dissipation surfaces and ventilation openings are unobstructed, with no unusual odor, browning, or repeated thermal shutdown. Allow the fixture to cool before handling. Keep combustible materials away from hot surfaces and follow the fixture’s installation clearances. Dust level, ventilation condition, observed temperature concerns, and cleaning or repair performed.
Electrical Connections Annually Inspect terminals, connectors, junction boxes, cable insulation, grounding conductors, and strain reliefs for looseness, corrosion, heat damage, or mechanical stress. Connections are secure, insulation is intact, grounding is continuous where required, and there are no signs of arcing or overheating. Only a qualified person should open electrical enclosures or test live circuits. Apply lockout/tagout and verify absence of voltage before contact. Circuit identification, test results, torque or connection checks, defects found, and technician details.
Driver and Control Gear Quarterly functional check; annual detailed review Check for delayed start-up, intermittent operation, audible noise, flicker, error indications, overheating, and compatibility with controls such as dimmers or sensors. The fixture starts reliably, operates without abnormal noise or visible flicker, and responds correctly to its control system. Do not bypass protective devices or substitute incompatible drivers. Replace components only with approved electrical equivalents. Driver or control reference, symptoms, operating test results, replacement details, and reset or configuration changes.
Emergency Lighting Monthly functional test; annual duration test Test indicator status, changeover operation, emergency illumination, charging condition, and battery performance in accordance with the applicable local requirements. Emergency fittings operate during the functional test and sustain the required duration specified by the applicable code or project design. Notify occupants before testing where loss of normal lighting may affect safety. Keep escape routes adequately controlled during the test. Test date, fitting identification, test type, duration, failures, battery condition, and corrective action.
Outdoor and Wet Locations After severe weather and quarterly Examine gaskets, cable glands, drainage paths, mounting points, and enclosures for moisture, impact damage, corrosion, or blocked drains. Enclosures remain intact and appropriately protected for the installed environment; no standing water or corrosion threatens electrical safety. Isolate power before opening an enclosure. Do not assume an outdoor fitting is safe to open when wet or visibly damaged. Weather event, enclosure condition, moisture evidence, seal or gland replacement, and follow-up inspection.
Mounting and Vibration Semiannually and after impact Check brackets, screws, suspension points, poles, and anti-vibration hardware for movement, cracks, corrosion, or fatigue. Fixtures are stable, correctly aligned, and free from movement that could damage wiring or affect aiming. Use suitable access equipment and fall protection. Do not work beneath an unsecured fixture or suspended load. Mounting condition, fasteners checked, alignment result, access equipment used, and repairs completed.
Performance and Energy Review Annually Review operating hours, control settings, recurring faults, energy consumption, replacement history, and areas with excessive maintenance demand. Operating schedules match occupancy needs, controls function as intended, and recurring failures have an identified root cause. Use electrical test equipment only as instructed and by competent personnel. Never defeat overload, earth-leakage, or over-temperature protection. Energy readings, operating schedule, fault trends, maintenance costs, and planned improvement actions.
Replacement Decision When performance or safety declines Replace a complete fixture or serviceable component when there is persistent flicker, unsafe damage, repeated driver failure, severe lumen depreciation, or failed testing. Replacement restores required illumination, electrical safety, environmental protection, and control compatibility. De-energize, lock out, verify isolation, and dispose of electronic components through the applicable waste-management route. Reason for replacement, removed component, installed specification, test results, disposal route, and commissioning date.

Safety note: Maintenance intervals should be adjusted for operating hours, dust, humidity, vibration, temperature, location, and local electrical or emergency-lighting requirements. Electrical isolation, lockout/tagout, access equipment, and personal protective equipment should follow the applicable workplace procedures and regulations.

Cleaning, Heat Management, and Environmental Protection

2026 Top LED Maintenance Tips for Optimal Performance?

Cleaning, heat control, and environmental protection determine whether an LED system stays efficient. The U.S. Department of Energy reports that LEDs use up to 75% less energy and can last 25 times longer than incandescent lighting. Dirt still reduces that advantage. Dust on lenses blocks light and traps heat around the housing. Inspect fixtures during scheduled servicing. Use a dry microfiber cloth, then a slightly damp cloth for stubborn residue. Avoid abrasive cleaners and spraying liquid directly onto the lens.

Tips: Clean in cool conditions. Check vents and fins. Record before-and-after light output when possible.

Heat deserves careful attention. The DOE report LED Luminaire Lifetime: Recommendations for Testing and Reporting identifies junction temperature as a critical lifetime factor. A blocked heatsink may cause dimming, color shifts, or early driver failure. Keep air paths open, remove leaves, and tighten loose mounting hardware. IES TM-21 guidance also requires disciplined lumen-maintenance projections. Those projections are not guarantees. Real installations are messier than laboratories, and this is where maintenance plans often become too optimistic.

Tips: Measure enclosure temperature. Inspect seals after storms. Match protection levels to the site under IEC 60529. Outdoor fixtures face moisture, salt, dust, and insects. A cracked gasket can quietly defeat an otherwise excellent design. Review corrosion, condensation, and cable entry points every season. Photograph defects, even minor ones. Small evidence supports better decisions later.

Power Supply, Wiring, and Driver Checks

2026 Top LED Maintenance Tips for Optimal Performance?

Power Supply, Wiring, and Driver Checks

LEDs can use at least 75% less energy and last up to 25 times longer than incandescent lamps, according to the U.S. Department of Energy. That lifespan depends on clean power, stable wiring, and suitable drivers. During inspections, check the power supply output with a calibrated multimeter. A reading that drifts under load may indicate overload, poor ventilation, or aging components. Do not trust appearance alone.

Inspect terminal blocks for discoloration, loose screws, cracked insulation, and moisture marks. Heat leaves clues. A warm connector or brittle wire deserves immediate attention. The National Electrical Manufacturers Association identifies thermal stress and connection quality as important factors in lighting-system reliability. Retighten connections only after isolating the circuit and following qualified electrical procedures. Small faults grow quietly.

Drivers need equal care. Confirm input voltage, output current, dimming compatibility, and enclosure temperature. The U.S. Department of Energy’s Solid-State Lighting R&D Opportunities report continues to identify power electronics and thermal management as performance priorities. Keep drivers away from trapped heat and blocked air paths. In field work, I often find clean fixtures with neglected drivers. That is an easy mistake. Record voltage, current, temperature, and inspection dates, then compare readings over time. A single test can mislead. Consistent records reveal decline earlier.

Troubleshooting, Component Replacement, and Maintenance Records

LED maintenance begins with disciplined troubleshooting, not immediate replacement. Check power quality, connectors, thermal conditions, and control signals before opening the fixture. A dark module may have a loose terminal, failed driver, or damaged circuit board. Look for browned insulation, flickering output, uneven brightness, and heat around ventilation paths. The U.S. Department of Energy reports that LED products can use at least 75% less energy and last up to 25 times longer than incandescent lamps. That advantage weakens when heat, moisture, or unstable voltage remains untreated.

Replace components using the original electrical ratings, compatible current ranges, and approved safety procedures. Photograph wire positions before removal. Record the part number, installation date, measured voltage, operating temperature, and reason for failure. Do not rely on memory. It fails quietly. A basic maintenance log can reveal repeated driver failures in one location, suggesting poor airflow or voltage disturbance rather than defective LEDs. The U.S. Department of Energy’s Solid-State Lighting research reports also identify thermal management as a continuing factor in LED performance and lifetime.

Review records monthly for critical installations. Compare brightness, energy readings, and fault frequency against earlier entries. A 2024 maintenance review may expose patterns that were invisible in daily operation. Still, records can be incomplete. Technicians sometimes note “replaced” without documenting why. That gap deserves correction. Use calibrated meters, retain test results, and schedule inspections before seasonal temperature changes. Reliable maintenance is measured by evidence, not confidence.

FAQS

How often should LED fixtures be inspected?

Inspect them monthly in dusty, humid, or vibrating areas. Check more often when conditions change.

What warning signs should I look for?

Watch for flickering, dark segments, cracked lenses, loose fasteners, and unusual discoloration. Small clues matter.

Is a warm LED housing normal?

Mild warmth can be normal. Unusual heat requires attention. Measure temperatures with a non-contact thermometer when possible.

How should LED lenses be cleaned?

Use a soft, dry cloth first. If needed, use a lightly dampened cloth and approved neutral cleaner. Never spray liquid directly.

What should I check on cables and ventilation openings?

Look for cuts, crushed insulation, loose connections, and moisture marks. Keep ventilation openings clear. Blocked airflow causes heat buildup.

How can maintenance be performed safely?

Switch off power at the correct isolation point. Verify the circuit is de-energized before opening an enclosure. Wear suitable protection.

What should be checked in the power supply and wiring?

Measure output with a calibrated multimeter. Inspect terminals for loose screws, discoloration, cracked insulation, and moisture. Do not trust appearance alone.

How can driver problems be identified?

Check input voltage, output current, dimming compatibility, and enclosure temperature. Keep drivers away from trapped heat. A clean fixture can still have a neglected driver.

Why should maintenance records be kept?

Record repairs, voltage, current, temperature, dates, and unusual symptoms. Compare readings over time. One test can mislead.

What maintenance mistakes should be avoided?

Do not bypass covers or safety devices. Do not handle hot components immediately. I have seen inspections rushed, and minor moisture marks became major failures.

Conclusion

How to maintain your LED lights for optimal performance? Start by understanding that LED systems depend on efficient heat dissipation, stable power, proper wiring, and suitable environmental conditions. Schedule routine inspections to check brightness, flickering, loose connections, damaged housings, moisture, and unusual heat. Always switch off and isolate the power before performing maintenance, and use appropriate protective equipment and tools.

Keep LED surfaces, vents, and heat sinks free from dust and debris by cleaning them gently with non-abrasive materials. Protect fixtures from excessive humidity, water, vibration, and extreme temperatures. Inspect the power supply, cables, connectors, and drivers for wear, corrosion, overheating, or unstable output. When troubleshooting, identify whether the issue comes from the fixture, driver, wiring, or surrounding conditions, and replace damaged components with compatible parts. Finally, maintain clear service records, including inspection dates, problems found, repairs completed, and replacement details, to support preventive maintenance and consistent long-term performance.

Sophia

Sophia

Sophia is a dedicated marketing professional with an exceptional depth of knowledge about her company's products and services. With a keen understanding of market trends and customer needs, she crafts insightful blog posts that not only inform but also engage readers, enriching the company’s online......